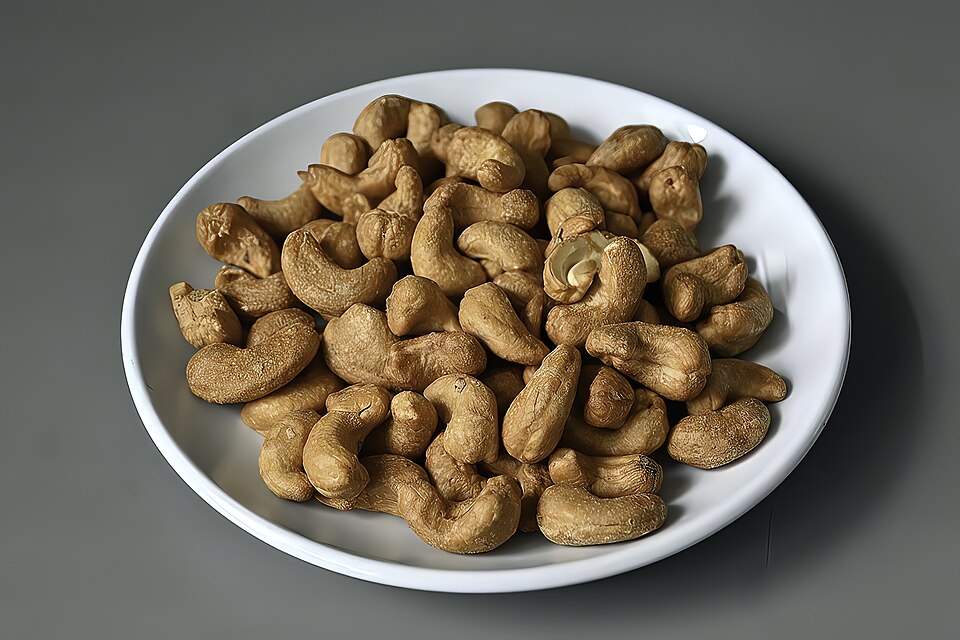
How to Roast Nuts Without Burning Them
Learn how to roast almonds, walnuts, pecans, and other nuts evenly. Compare oven temperatures, cooking times, stirring techniques, and doneness signs.
Why Nuts Burn So Easily
Nuts are dense, dry, and rich in natural oil. That oil helps carry heat into the center, which is why a nut can look pale on top while its underside is already too dark. Smaller pieces and chopped nuts roast faster because more surface is exposed. A dark baking sheet can also brown the underside aggressively. The smell changes quickly near the end: a mild warm, toasted aroma becomes sharp and acrid when the oils scorch. Roasting is therefore a timing exercise. Start checking before the recipe’s stated endpoint and remember that the tray remains hot after it leaves the oven.
Different Nuts Need Different Attention
Almonds and hazelnuts are relatively firm and can tolerate a little more time than thin walnut halves. Pecans and pine nuts contain a lot of oil and can move from golden to burned quickly. Cashews often show color on the flat edges first. Chopped nuts roast faster than whole nuts, and sliced almonds may need only a short finishing window. If a recipe combines several kinds, cut them to similar sizes or roast the fastest nuts separately. A single universal time is less reliable than the combination of oven temperature, piece size, tray material, and your visual and aromatic checks.
Set Up the Oven and Tray
Heat the oven to 325°F and position a rack near the center. Use a light-colored rimmed baking sheet if possible, and spread the nuts in one layer with no piles. Parchment can make cleanup easier, but it does not replace even spacing. If the nuts are coated with oil, use only enough to carry spices; a wet coating can brown unevenly. Do not roast a cold tray straight from a crowded refrigerator because the starting temperature changes the timing. Measure the nuts before spreading them, and keep a cool plate ready for the moment they come out.
A Step-by-Step Roasting Method
Spread the nuts, place the tray in the preheated oven, and set a timer for a few minutes earlier than your expected finish. Stir or rotate the tray halfway through so the edges do not darken before the center. Begin checking every 2 to 3 minutes near the end. Look for a light golden tone, a dry surface, and a rounded toasted aroma. Remove the tray when the nuts are just shy of the color you want. Immediately slide them onto a cool plate or another room-temperature tray. Keep them in a single layer while they cool so steam does not soften them.
How to Tell When Nuts Are Done
Color is useful but not enough. A roasted nut should smell fragrant and taste crisp after cooling. Break one larger nut open to check whether the interior has warmed and developed a toasted flavor. Pale nuts may need another short interval, but do not wait for a deep brown exterior because the residual heat will push them further. If the nuts are seasoned, sugar and spices can hide color changes, so taste a plain piece when possible. Write down the actual time for your tray and oven; the next batch can start with a better estimate.
Why Residual Heat Matters
The baking sheet and the nuts store heat. If you leave nuts on the hot tray, the bottom continues to toast even after the oven is off. This is especially important for pecans, pine nuts, sliced almonds, and finely chopped pieces. Transfer them as soon as they reach the early stage of doneness. A cool plate stops the direct heat, while a shallow layer lets steam escape. Do not cover warm nuts in a jar. Wait until they are fully cool before storing, otherwise trapped moisture can reduce their crispness and create a stale flavor.
Fix Uneven or Burned Nuts
Uneven color usually points to a crowded tray, hot spots, or a mixture of different sizes. Roast in a smaller batch, stir more often, or use separate trays for large and small pieces. If only a few nuts are dark, remove them immediately and continue cooling the rest. Heavily burned nuts taste bitter and are not worth mixing into a recipe. For a second roasting attempt, lower the heat to 300°F and extend the time while checking frequently. This slower approach is useful when the nuts are expensive or already chopped.
Cool and Store the Batch
Once cool, store roasted nuts in an airtight container away from heat and light. Label the container if you roast several varieties. A refrigerator or freezer can extend quality for a larger batch, but allow nuts to return to room temperature before opening a cold container so condensation does not settle on them. Use roasted nuts as a topping for grain bowls, salads, or crispy roasted chickpeas. They also add texture to vegetables roasted with the method in how to roast vegetables.
A Repeatable Roasting Rule
The safest rule is moderate heat, one layer, early checking, a mid-roast stir, and immediate cooling. Nuts should look and smell almost finished when they leave the oven because residual heat completes the last part of the roast. Once you know how your oven browns a tray, record the timing for each nut and cut size. That small note is more dependable than blindly following one number for every nut.
Use a Small Test Batch
When roasting a new nut, tray, or oven setting, begin with a small test batch. Note the tray position, the minute when the aroma becomes noticeable, and the minute when the first nut turns golden. This is useful because ovens vary and nuts sold under the same name can differ in size. Once the test batch cools, taste the center rather than judging only the outside. Adjust temperature or timing for the full batch, then keep the notes with your baking sheets. A small calibration batch costs less than losing a large jar to a burnt finish.
When a recipe calls for roasted nuts inside a baked dish, stop the nuts slightly earlier than you would for eating them alone. They receive another round of heat in the oven or on the surface of a hot dish. For a garnish, cool them completely before chopping so the knife makes clean pieces instead of compressing warm oily nuts. A small pinch of salt can make the aroma seem more pronounced, but it does not prevent burning. Season after roasting when you want a clear toasted flavor and more control over the final balance.
For a recipe that needs finely chopped nuts, roast them whole first and chop after cooling. Small pieces have more exposed surface and can burn before the centers develop flavor. If you must roast chopped nuts, use a shallow layer, lower the oven slightly, and stir at short intervals. Keep the tray within reach rather than relying only on a timer. The aroma is the most useful signal because it changes before the color becomes obvious on a dark tray.
Step-by-Step Checklist
- Heat the oven to 325°F and spread nuts in one layer.
- Stir or rotate the tray halfway through.
- Begin checking early for fragrance and light color.
- Transfer nuts off the hot tray immediately to cool.
Sources:
- USDA FoodData Central — Nuts and Seeds (USDA FoodData Central)
- USDA Food Safety and Inspection Service — Leftovers and Food Safety (U.S. Department of Agriculture)
- Wikimedia Commons — Roasted_Cashew_Nuts_(52746470588).jpg (Wikimedia Commons)