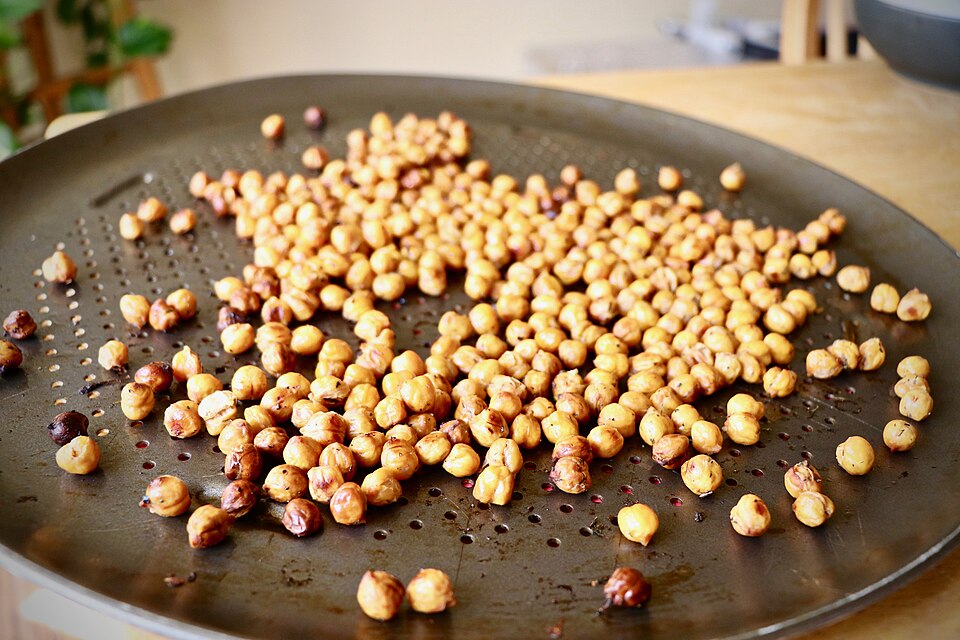
How to Make Crispy Roasted Chickpeas
Learn how to prepare crunchy roasted chickpeas with simple ingredients. Follow practical steps for drying, seasoning, oven temperature, and keeping them crisp.
What Makes Roasted Chickpeas Crisp
Crisp chickpeas need the outside water removed before they enter the oven. Canned chickpeas are already cooked, so the roasting step is mainly about drying the surface and concentrating the texture. If they are wet, the oven spends the first part of the cook creating steam. The chickpeas soften before they have a chance to brown. A thin film of oil improves heat transfer and helps seasonings cling, but too much oil makes the shells heavy rather than crisp. The final texture also develops as the chickpeas cool, so do not judge them straight from the oven.
Canned Versus Dried Chickpeas
Canned chickpeas are convenient and provide consistent cooked texture. Rinse them to remove the packing liquid, drain well, and pat them dry. Dried chickpeas need to be soaked and cooked until tender before roasting; undercooked centers remain hard while the outside darkens. If you cook a large batch, reserve the chickpeas you plan to roast and cool them before drying. Canned chickpeas often have loose skins that can be rubbed away, but removing every skin is optional. A few loose skins may crisp quickly, so watch them near the end.
Dry the Surface Thoroughly
Spread the drained chickpeas on a clean towel and pat them dry. Roll them gently under another towel to remove droplets, then let them sit for a few minutes while you prepare the tray. If skins come loose, pick out the ones that are easy to remove. Do not crush the chickpeas while drying. The surface should feel dry rather than slick. This step seems small, but it is the main difference between a chickpea that roasts and one that steams. If you are working with a large batch, dry in two rounds so the towel does not become saturated.
Use Moderate Oil and Seasoning
For one standard can of chickpeas, start with a small drizzle of neutral oil and toss until the surface is lightly coated, not wet. Add dry spices that tolerate oven heat, such as paprika, cumin, garlic powder, or black pepper. Add delicate herbs or a bright acidic ingredient after roasting because they can burn or make the shells soft. Salt can be added before or after roasting; a light pre-seasoning helps flavor the surface, while a final pinch tastes brighter. Keep the coating thin so the heat can reach the chickpea skin.
A Step-by-Step Roasting Method
Heat the oven to 400°F and line a light-colored rimmed tray if desired. Spread dry chickpeas in one layer with space between them. Roast for about 25 to 35 minutes, shaking the tray every 10 minutes so the bottoms do not stay pale. Begin checking earlier if the chickpeas are small or your tray is dark. They should look browned and feel firmer, but the center may still be slightly tender while hot. Turn off the oven only after you have judged the texture; leaving the tray in a hot oven can over-darken them.
How to Know They Are Done
A finished chickpea has a dry, crisp shell and a nutty roasted smell. Test one after it cools for a minute, then test another once fully cool because the center firms as steam leaves. If the outside is dark but the inside is soft, lower the oven to 375°F next time and roast longer, or use a lighter tray. If the chickpeas are pale and chewy, they need more drying time and better spacing. Avoid chasing a deep brown color; a lighter golden batch can have a more pleasant flavor.
Cool and Store Without Losing Crunch
Spread the roasted chickpeas on a cool plate or leave them on the tray only until the steam has escaped, then transfer them to a loosely covered bowl. A sealed container traps residual moisture and quickly softens the shells. Once fully cool, use a container with some ventilation and keep it away from humidity. They are best eaten soon after roasting. If they soften, a short reheat in a dry oven can restore some crispness, but do not add more oil. Use them as a topping for salads or vegetables roasted with a simple oven method.
Common Problems and Fixes
Chewy chickpeas usually started too wet, were crowded, or were sealed while warm. Burned spices can come from too much seasoning or adding sugar before roasting. Uneven browning means the tray was not shaken or the chickpeas were different sizes. If the skins pop, lower the heat slightly and check the batch more often. You can also roast plain chickpeas first, then toss them with a spice blend. The cooking approach is distinct from simmering dried beans, which is about tenderness rather than a dry crisp shell.
A Flexible Flavor Pattern
Make one plain batch and divide it after cooling. Add smoked paprika to one portion, lemon zest to another, and a mild herb blend to the third. Keep wet sauces separate because they soften the crisp surface. For a toasted garnish, combine the chickpeas with roasted nuts only after both ingredients are cool. This gives you variety without changing the base roasting process.
Adjust for Your Oven and Batch Size
The stated roasting time is a starting point, not a guarantee. A convection oven may brown the chickpeas sooner, while a crowded tray or a damp batch may need longer. Use the first batch to learn your oven: record when the skins begin to crackle, when the color changes, and how firm the chickpeas become after cooling. If the tray is crowded, split it before raising the temperature. More heat can burn the spices while the centers remain soft. Even spacing improves the result more reliably than extreme heat.
For a batch that will be served over a salad, keep the chickpeas separate until the last moment. Salad dressing and steam from warm vegetables soften the shell quickly. If you are making them for a snack, roast a little longer at a lower temperature after the first browning stage rather than raising the heat. Check one cooled chickpea before deciding that the batch is finished. A hard shell with a tender center is a different result from a fully crunchy chickpea, so choose the endpoint based on how you plan to eat it.
If you use cooked dried chickpeas, cool them completely before drying and roasting. A warm, moist center needs more time than a canned chickpea, and adding both types to one tray makes the endpoint uneven. Roast matching batches together and label them after cooling. A shallow tray with a clean surface also makes it easier to see loose skins and remove a few pieces that have browned too quickly. The goal is consistent airflow around every chickpea, not maximum oven temperature.
Step-by-Step Checklist
- Drain, rinse, and dry cooked chickpeas until the surface is no longer wet.
- Toss with a small amount of oil and dry seasoning.
- Roast at 400°F in one layer, shaking every 10 minutes.
- Cool uncovered before storing or serving.
Sources:
- USDA FoodData Central — Chickpeas (USDA FoodData Central)
- USDA Food Safety and Inspection Service — Leftovers and Food Safety (U.S. Department of Agriculture)
- Wikimedia Commons — Eating_Healthy_on_the_Run_Protein_Bites,_Roasted_Chickpeas_(35527731653).jpg (Wikimedia Commons)